- General information:
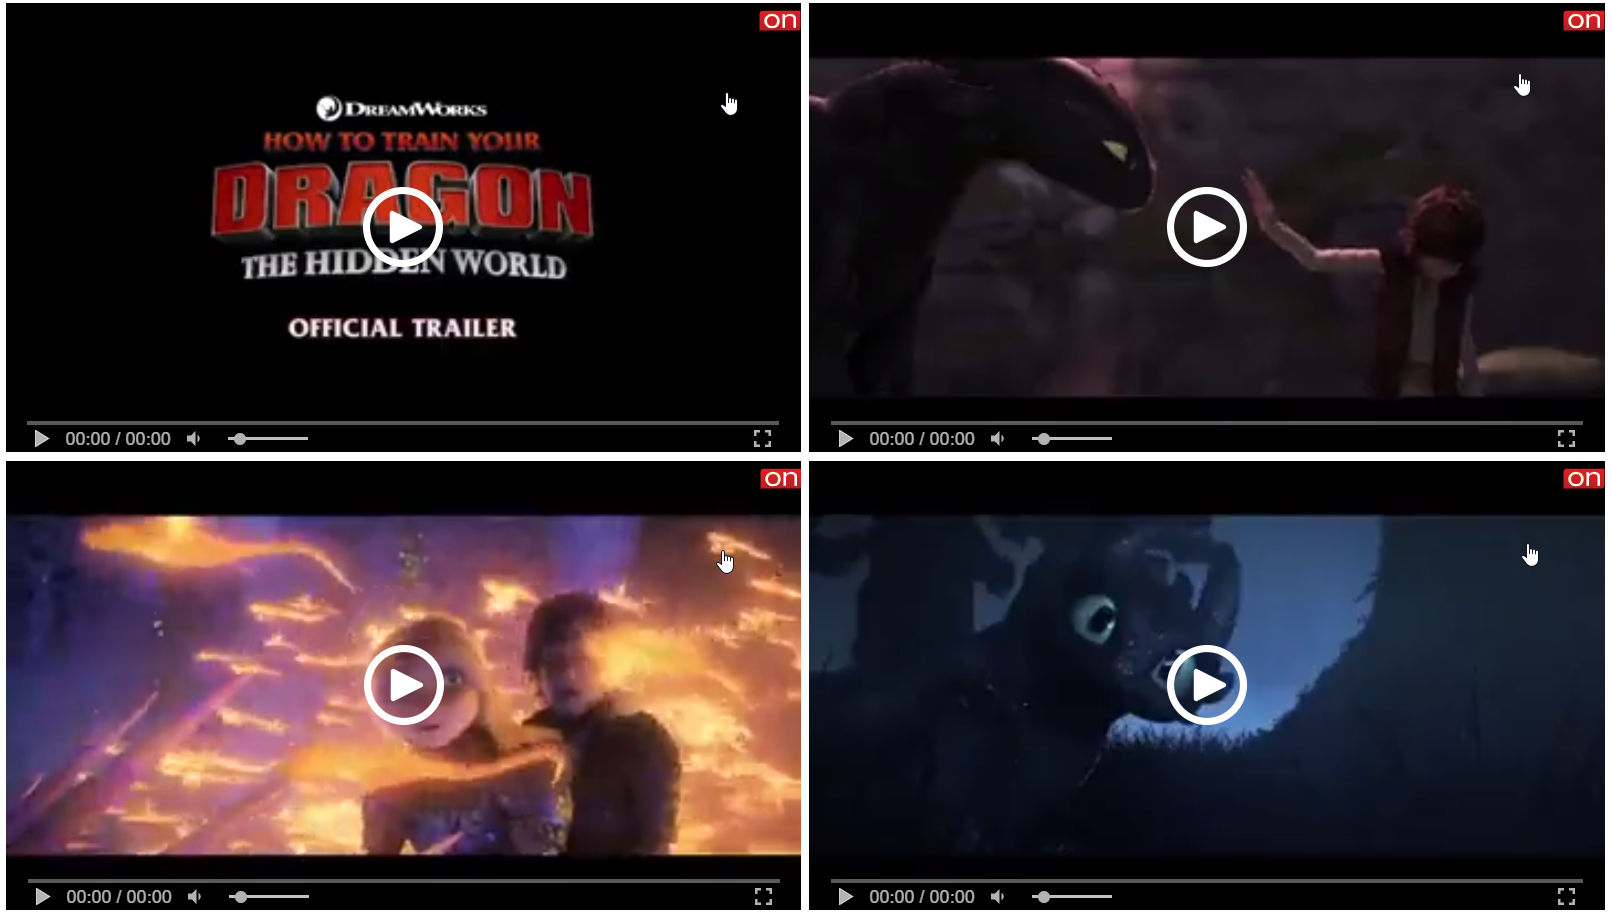
- Examples:
- part of original video (example)
- static frames (example)
- static frames + part of original video (example)
- part of original video (example)
- static frames (example)
- static frames + part of original video (example)
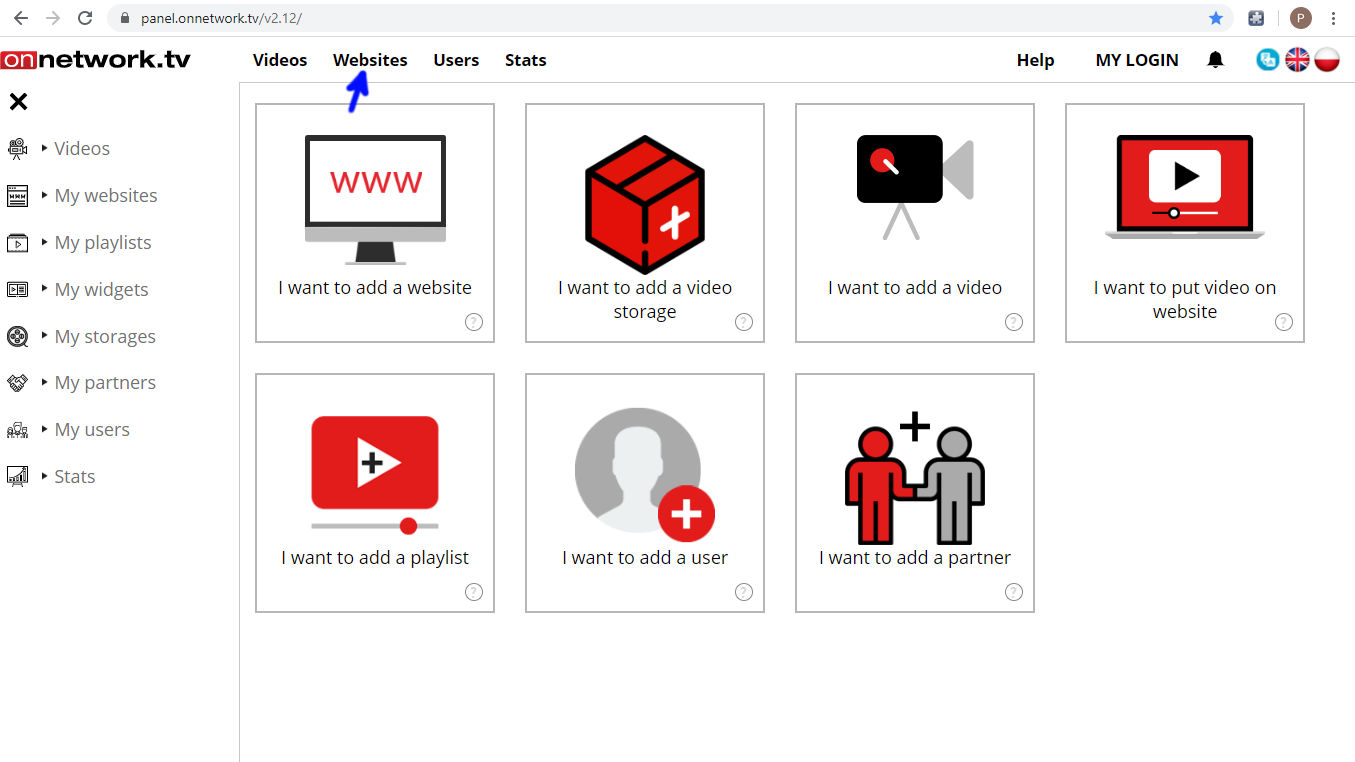
- How to create a moving poster for material:
- Choose Websites from top bar menu:
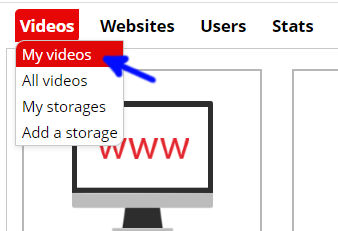
- After hovering the mouse click My videos:
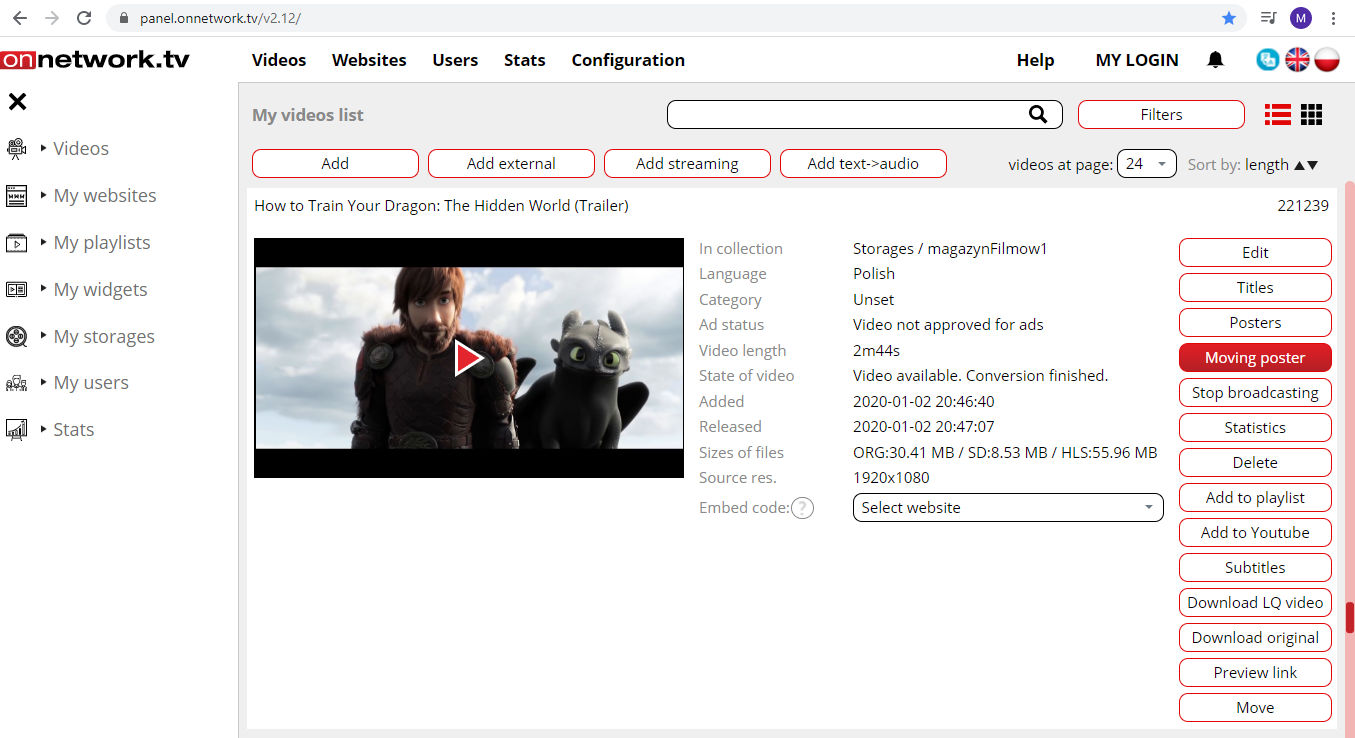
- A list of your own materials will be displayed. Click on the Moving poster button next to the material for which you want to generate a moving poster:
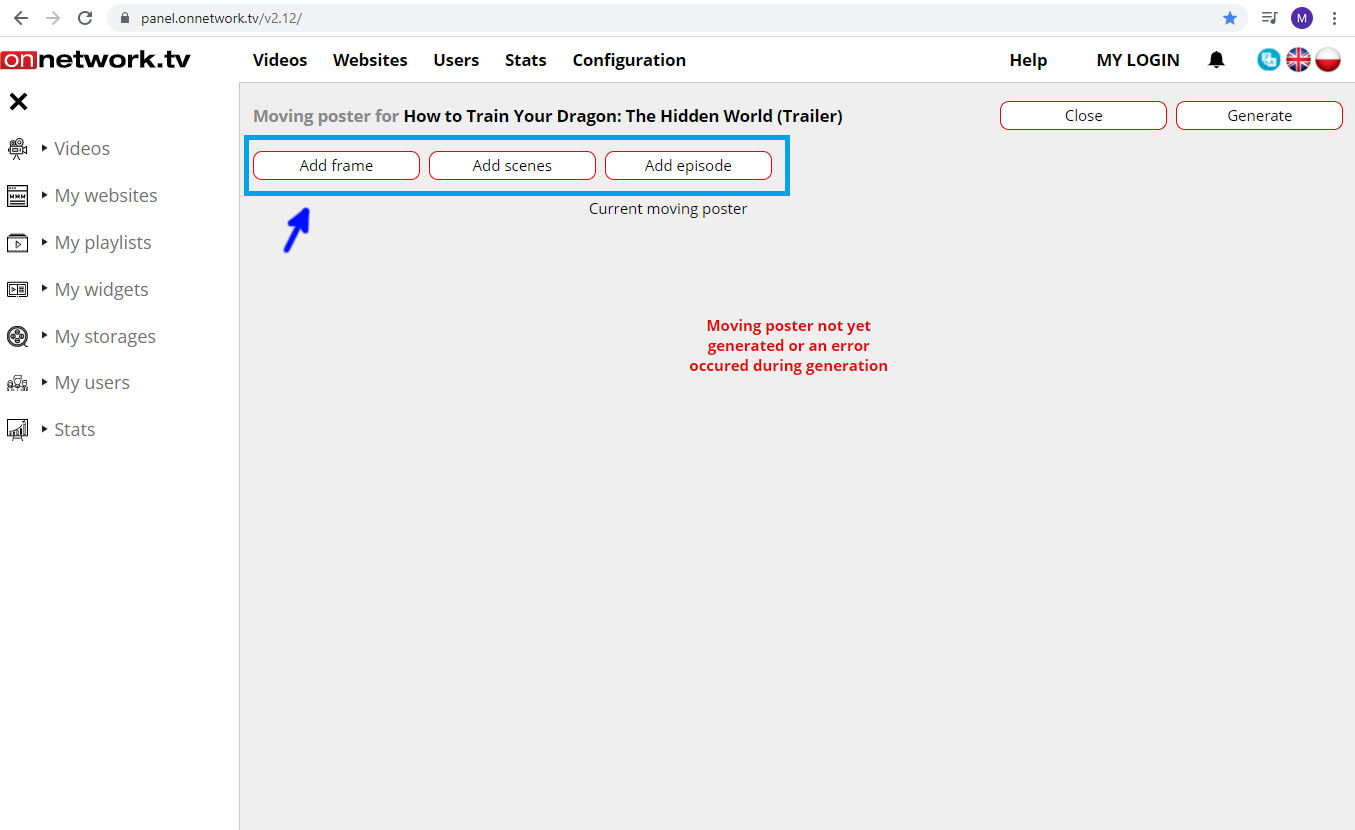
- We will be directed to editing a moving poster. The blue marked buttons are used to create fragments from which the moving poster will be generated. Important! The total length of a moving poster can be up to 12 seconds. The maximum length of a fragment is also 12 seconds, because a moving poster can also be generated from one fragment.
- How to enable the display of moving posters:
In line with the popular trend, we provide the possibility to preview the content of the material before it starts in the form of a moving poster displayed by the player. The moving poster can consist of single frames and cuts of material. Depending on the settings, it can be started after hovering the mouse cursor over the player or automatically after loading the player on the page. The resolution of the moving poster is 360x200px, and its maximum duration is 12 seconds.
A moving poster automatically activated as:
The Add frame button is used to create a fragment of a moving poster in the form of a selected frame of the material:
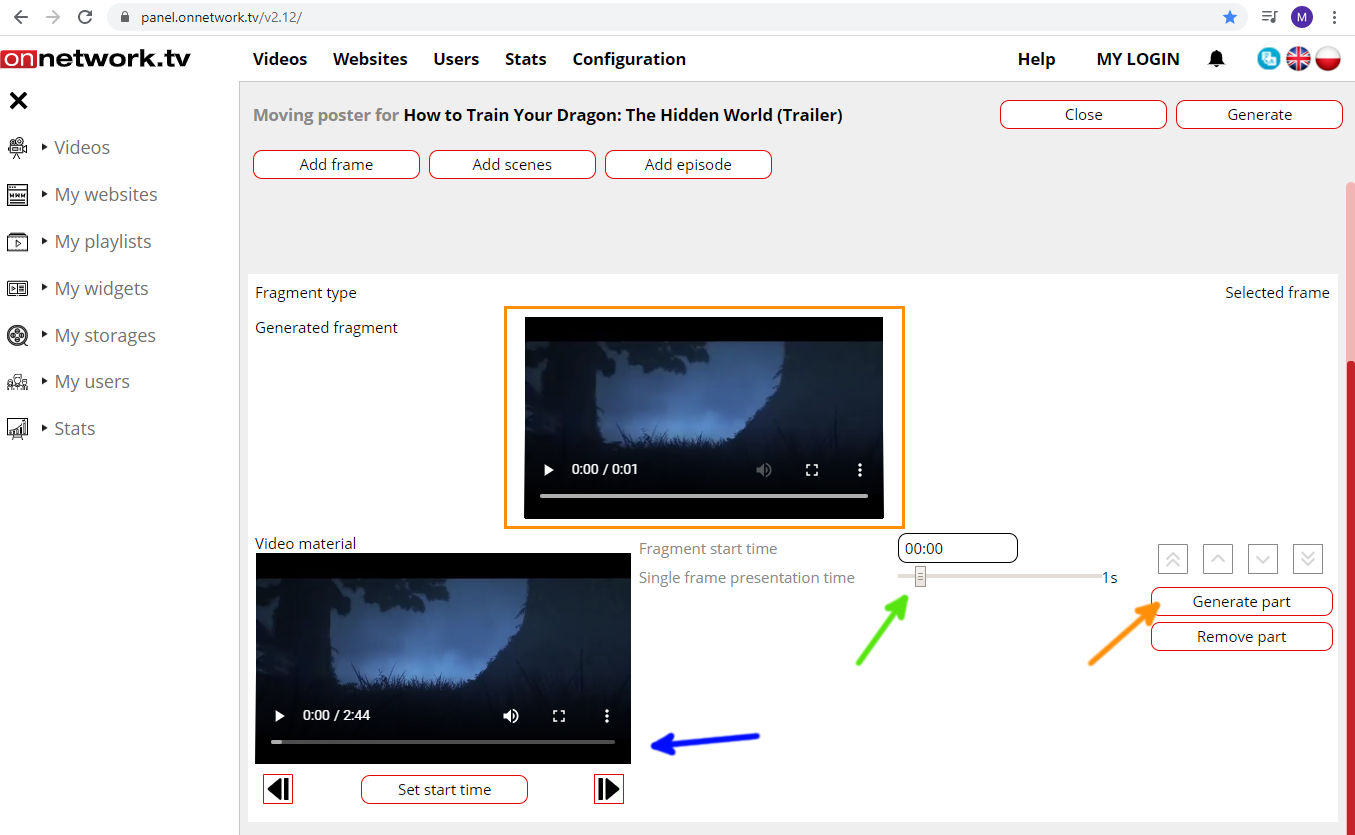
On the lower left side of the screen there is a preview of the original material (blue arrow). Move the progress bar and select a frame. The arrows underneath are used to precisely move the material by single frames. When a frame is selected, confirm this by clicking the Set start time button.
After this action, the Fragment start time (green arrow) should change to the time when the selected frame of the original material is present. By moving the slider, you set how many seconds of the selected frame is to be displayed.
By clicking the Generate part button (orange arrow), a preview showing the created fragment should appear in the place marked by an orange rectangle.
If the generated fragment does not represent the selected frame, correct its start time with a few clicks on the lower arrows, then confirm with Set start time and Generate part. Such situations may occur due to slight differences in frame recording between the used codecs.
The Add scenes button is used to create a fragment of a moving poster as the first frames of changing scenes:
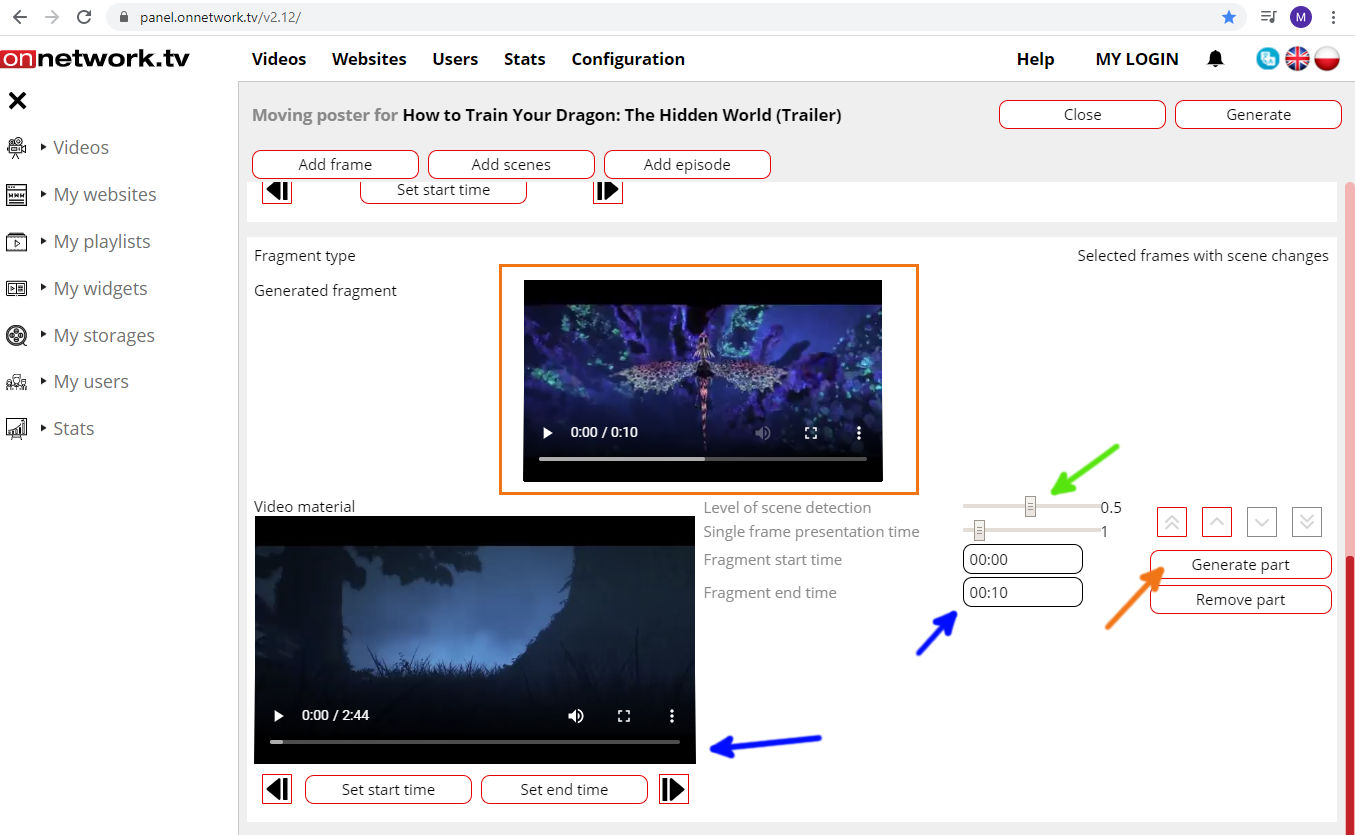
At the beginning, you set the range of material from which the frames are to be generated. To do this, select the beginning of the interval using the progress bar and the lower arrows, select the beginning of the interval and confirm with Set start time and select the end of the interval and confirm with Set end time. After this action, in the middle part of the section with settings (second blue arrow), the fragment start and the end time should change to the selected one.
The number of frames is generated depending on the Level of scene detection parameter, the lower its value, the more changes are detected, resulting in more frames. Single frame presentation time means the time of displaying each detected frame.
By clicking the Generate part button (orange arrow), a preview showing the created fragment should appear in the place marked by an orange rectangle.
The Add episode button is used to create a fragment of the moving poster from a part of original video:
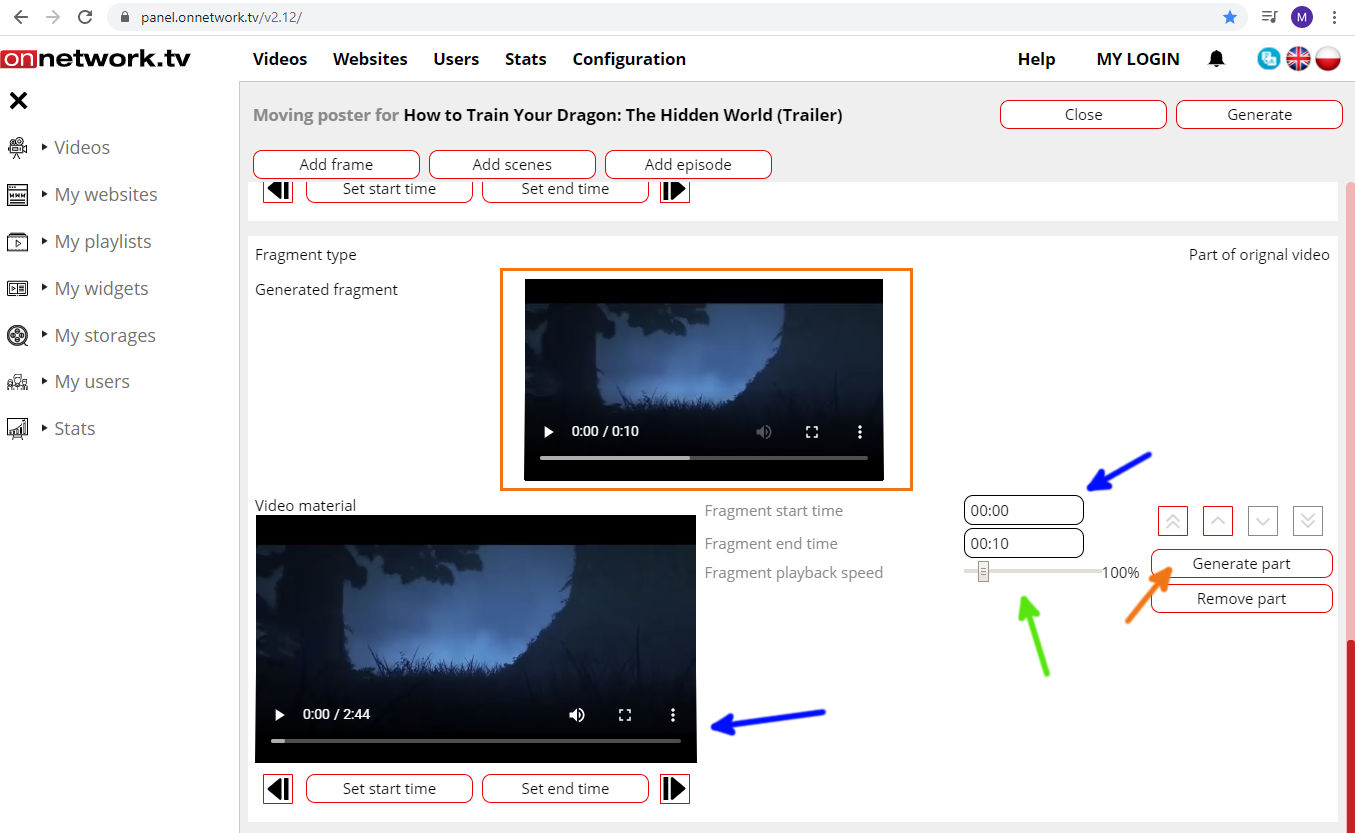
As in the previous point, in the place marked with a blue arrow, a range of material from which a fragment of a maximum total length of 12 seconds will be generated is selected. In the place marked with a green arrow, the speed of the fragment is being set so that the generated fragment can be speeded up or slowed down instead of the real speed.
By clicking the Generate part button (orange arrow), a preview showing the created fragment should appear in the place marked by an orange rectangle.
The Generate button is used to generate a moving poster from previously created fragments. After clicking the button, a preview showing the generated moving poster should appear in the place marked with a green rectangle:
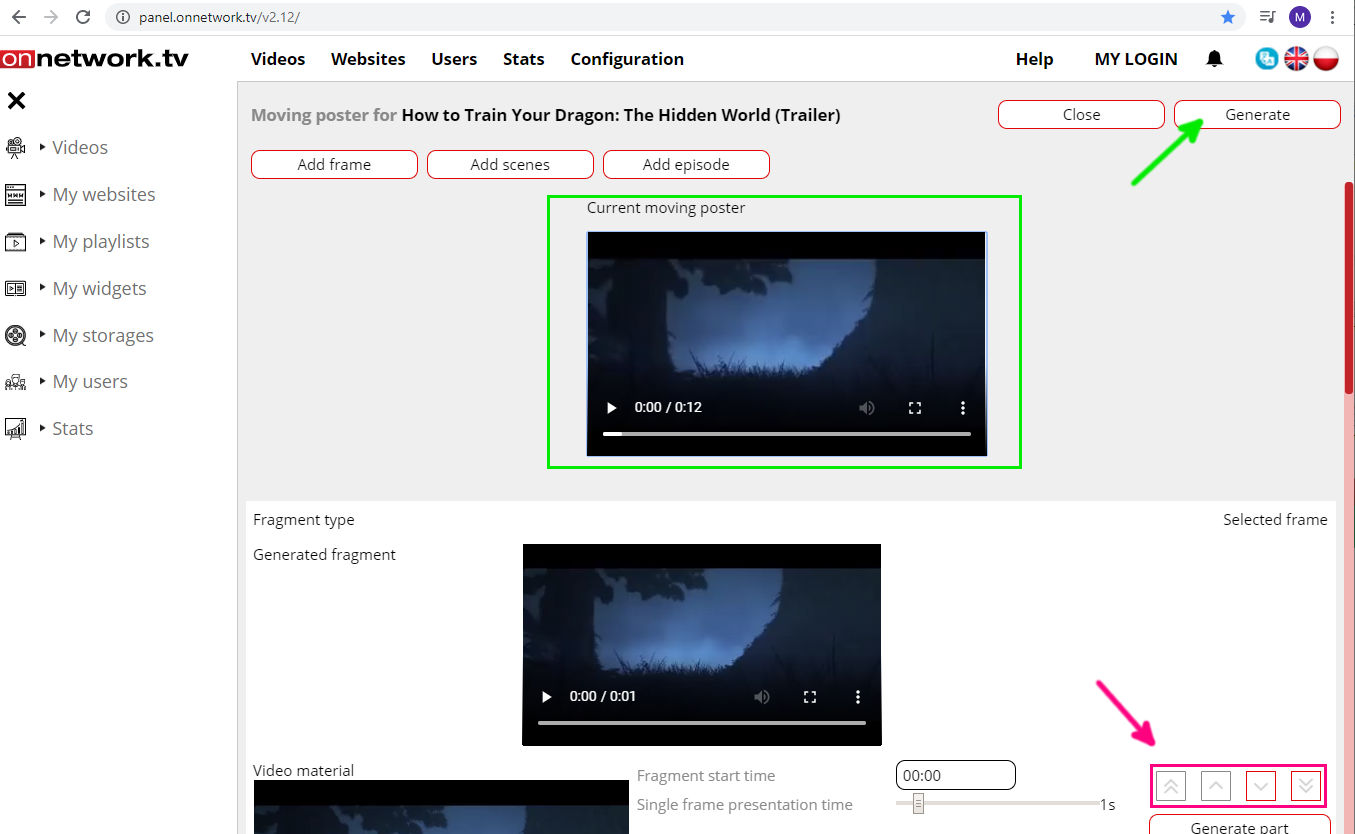
It is made up of fragments that are combined with each other in the order in which they are in the list of fragments. The order of the fragments can be controlled by moving their position in relation to each other with the buttons marked pink. The total length of a moving poster can be up to 12 seconds. While the poster is being generated, everything that is after its 12 seconds is cut off.
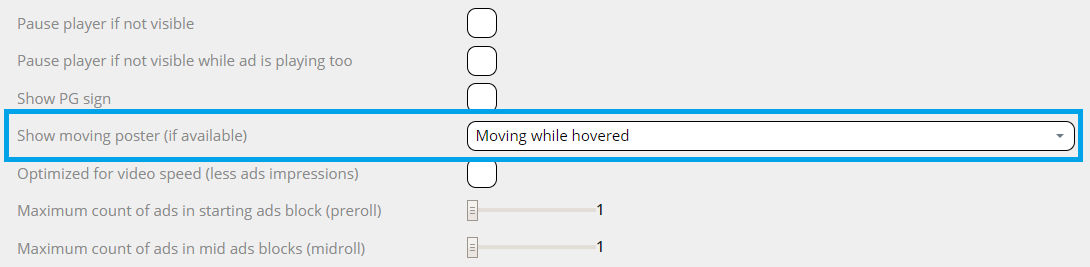
It is switched on in the tab Desktop/mobile settings for the website/playlist/widget (more in Help -> Last changes -> November 2019 -> 2.Different settings for mobile and desktop) and when creating modified code on the basis of: do not display a moving poster, display always moving poster(if available for the material), display moving only when hovering the mouse. In case of settings for mobile devices, the option of displaying a moving poster after hovering the mouse is not recommended.